In order to create a beautiful and stunning body painting, you should follow a few key steps when bringing your wildest imaginations to life.
Even if you paid for some of the best body paint in the world, without following these steps, all of your hard work will be for naught as the painting will simply lose its luster after a few hours.
In today’s guide we are going to break things down in three easy-to-read sections:
- Proper skin preparation before applying body paint (prevent cracking, peeling, clumping, etc.)
- How to apply body paint
- How to remove body paint effectively (and reduce the chance of staining your skin)
Once following all the easy and clear steps in this guide, you will have much better results the next time you go to paint your body.
Let’s dive in:
Table of Contents
How To Prep Your Skin Before Body Painting
In this section we are going to cover two key areas before body painting:
- Importance of skin prep
- Why a setting spray/powder is necessary
Let’s start with the essential skin prep steps you should follow:
Importance of skin prep
Before the paint is applied to skin, it’s recommended that you take a shower and wash thoroughly.
While this might seem counter intuitive since you will of course be taking a shower once you are done wearing the body painting – it’s a simple step that you shouldn’t skip.
Throughout the course of the day, your body naturally excretes oils (sebum oil).
A thorough wash will remove these oils and allow the paint to latch on in a much easier manner.
This step will be critical especially if you have oily skin on your face (in particular the T-Zone), as it will be tougher to keep the paint appearance consistent.
If 4th grade science class is any reminder, oil and water don’t mix well – and neither will be the case with the oil on your skin and the water-based composition of your body paint.
In short, take a shower before body painting – it’s important if you want the end results to look good.
Shower + barrier / setting spray
The deeper you get into the world of body painting, the more you learn about some of the obscure products that the pros like to use.
One of those is the setting spray.
Setting sprays are simply a mixture of water, alcohol, and a few other ingredients that allows for a better base for the body paint to latch on to.
Should you skip out on the shower (which you shouldn’t), a setting spray works great in a pinch to help lightly ‘clean’ your skin of excess oils.
Furthermore, the solution also acts as a barrier that rests between your skin and the paint – helping to reduce any chance of an allergic reaction from any of the ingredients found in the body paint.

How To Apply Body Paint
Now that you have showered and applied a light coat of a setting spray to the area of the body that you plan on painting – now its time to get to work.
Here are a few key tools that Broadway makeup artists love to use in order to get the best results when it comes to body painting:
Plan Your Painting
Before the first drop of paint goes onto your body, its imperative that you take a few minutes to plan out your painting.
Not only will this make for better results – but you can also see where large color blocks will go (which is key in lessening the amount of time spent cleaning your brushes or sponges between colors).
If you are working with water-based body paints (which you likely are), a simple outline of the color blocks is great for planning.
Should you make a mistake, you can simply just wipe clean with a warm and soapy paper towel and try again.
Body Painting Brushes
Should your body painting have lots of little details, dots, or line work throughout, a quality paint brush will be key.
Body painting artists like to rely on two separate sets/types of brushes:
- Kabuki (or similar) large brushes for large swaths of painting
- Artist grade paint brushes (i.e. round, filbert, flat, rake, etc.) for detailed work
Now its important to note that when working with a water-based paint, you should go with either a synthetic or Kolinsky sable brush as they have a great level of springiness to them and don’t completely lose their backbone when dipped into water.
Other animal bristled brushes such as boar, camel, etc. tend to get ‘dead’ or ‘flat’ when submerged in water – while these are ok in a pinch, on the long run, they won’t be able to hold as much paint or keep a fine edge for the strokes.
We like to recommend body painting artists to check out our best watercolor brushes guide we recently wrote as the properties found in watercolor brushes are nearly identical for those in body painting brushes.
High Density Sponges
In lieu of using a kabuki or other large brush, sponges are a terrific way to get a uniform and non-streak results in a body painting.
However, when selecting a sponge, you will want to go with the proper type.
Instead of a typical sponge you might have in the kitchen that has large holes in it (although this could be used if you are in a pinch), professional face and body painting artists love to use a high density sponge.
High density sponges have more of a microfiber texture to them and will ensure an even pigment load.
When selecting the sponge size, you are better off going with one that is only a few inches at most in size.
A smaller size (even when body painting) is much easier for you to control while also being easy to dip into the pans of body paint within your palette.
Personally we like to recommend a high density sponge like this one – it’s from a reputable face paint company and will be sure to withstand the test of time.

Airbrushing
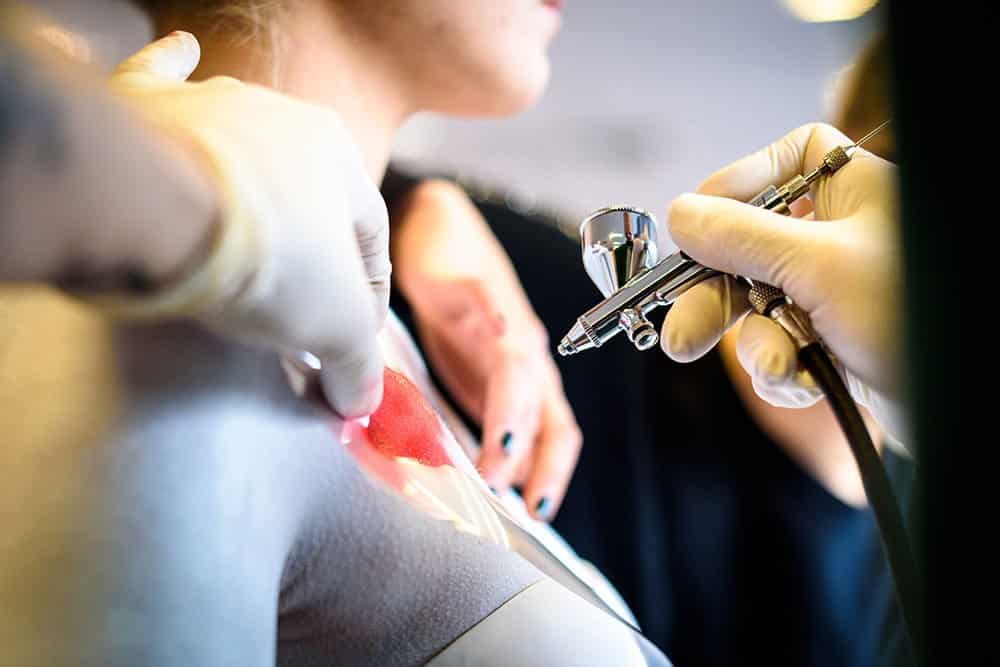
The last, and slightly less popular way, to apply body paint would be via an airbrush.
Airbrushes are terrific for those who are making a living from body painting or find themselves painting regularly.
With the reliance on just a few simple tools – airbrush + compressor. You can get a smooth layer of paint down in very little time.
One of the biggest differences when using this compared to just a traditional palette of body paint will be the type of paint required – a thin liquid body paint rather than a cake or pan.
Setting Spray After The Body Paint Has Been Applied
While we covered the importance of a setting spray in the prep stages, its actually a dual use product.
Once you are finished with your body paint, applying a light mist of a setting spray or powder will help to preserve the colors on your skin a bit better.
Therefore, should you be doing any performance (i.e. stage, dancing, etc.), you won’t have to worry about your body paint becoming runny while sweating.
For those of you who plan on body painting for cosplay or simply a convention, an extra layer of setting spray will be perfect if you are moving around all day and taking pictures.
The last thing you would want is to take a picture and have your cheek pressed against someone else and having the paint transfer off your skin – ruining both yours and the others costume.
How To Remove Body Paint
Removing body paint is a relatively straightforward process – especially if you are using a water-based paint.
Water-Based Body Paint Removal
To remove water-based body paint, you can just simply hop into the shower and scrub with warm and soapy water.
We do recommend using a throwaway wash cloth for this purpose, just in case the paint causes any staining (most likely not, but really depends on the company’s source for pigments).
Oil-Based Body Paint Removal
For those of you who went with an oil-based body paint, the cleanup process will be a bit more involved.
As we mentioned earlier in this article, oil and water naturally don’t mix well together, so attempting to use warm soapy water in the shower will take quite a bit of effort.
Instead, you will need to use a solvent that will break down the oil and allow it to run smoothly off your body.
Some of the trusted solutions used by pros include waterproof makeup remover, a facial or body cleanser that targets oil, baby oil, or in extreme cases – dishwashing detergent that targets grease (just make sure you moisturize after you use this one).
A slightly abrasive sponge will also help to provide enough grit in order to fully remove.

Becoming Better At Body Painting
Even if you get the most expensive body paints used in movies, Broadway plays, etc. it won’t make you better.
Whether you are painting on a canvas or a body – becoming good at a medium takes time and practice.
So be sure that you get in the studio, don’t let your supplies gather dust, and make it a habit.
But most importantly, have fun!